Selling price groups
Set up separate price lists — Retail, Wholesale, or your own — and choose one at checkout.
If you sell the same product at different prices depending on who's buying — for example a lower price for wholesale customers — set up a price group for it instead of manually discounting every wholesale sale.
Setting up a price group
- Go to Products → Price Groups.
- Select + New Selling Price Group (or Add).
- Enter a name (for example "Wholesale" or "Employee") and an optional description.
- Optionally set a Minimum Quantity — leave it at 0 for no auto-apply, or see Auto-applying a price group by quantity below.
- Select Save.
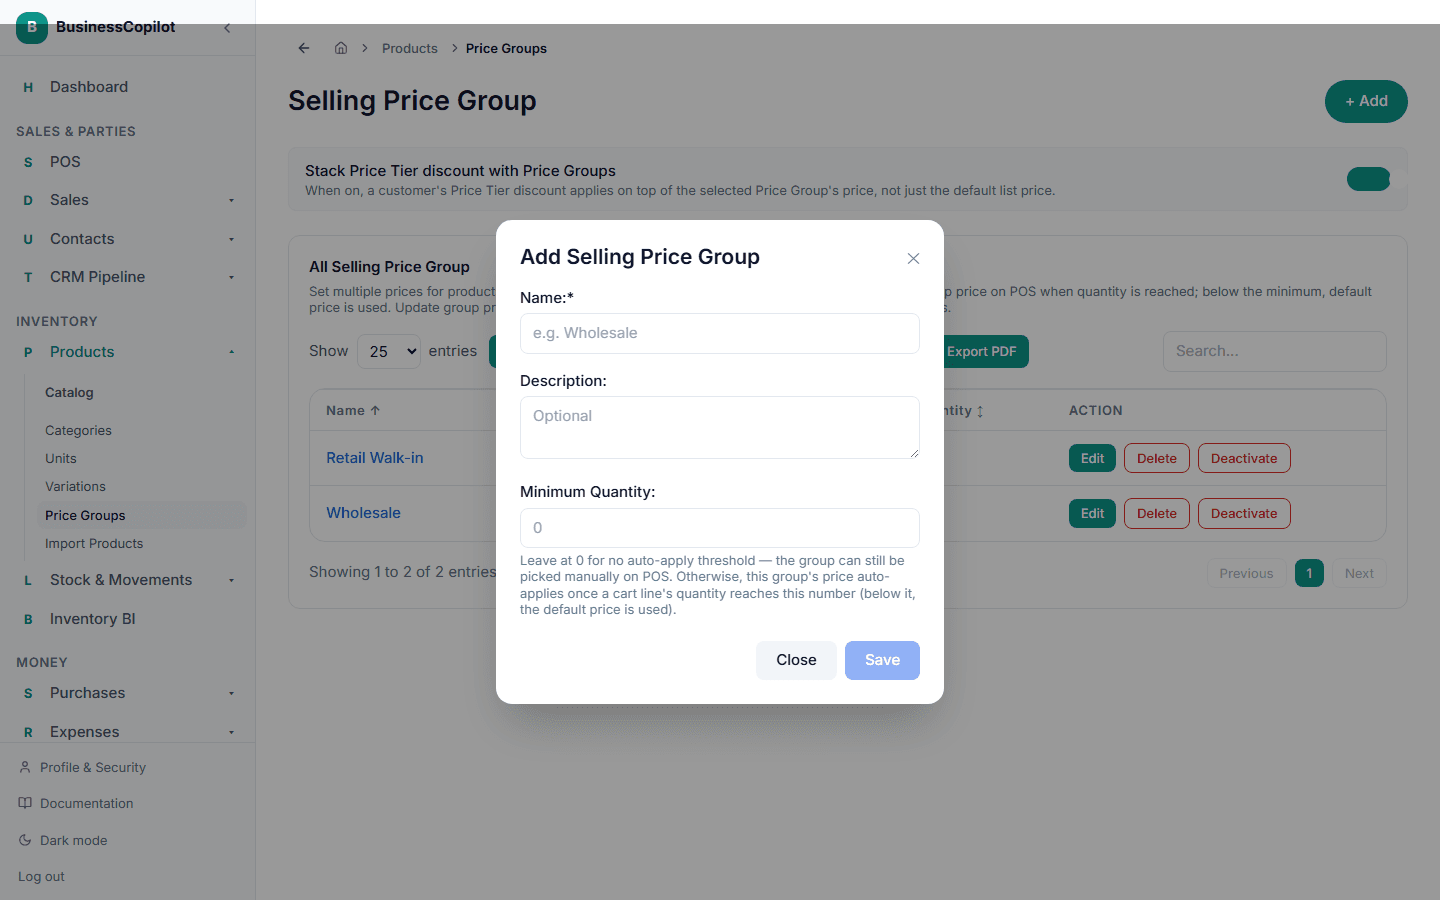
From the list, you can also Edit a group's name, description, or minimum quantity, Deactivate one without deleting it, or Delete it entirely.
Setting a product's price for that group
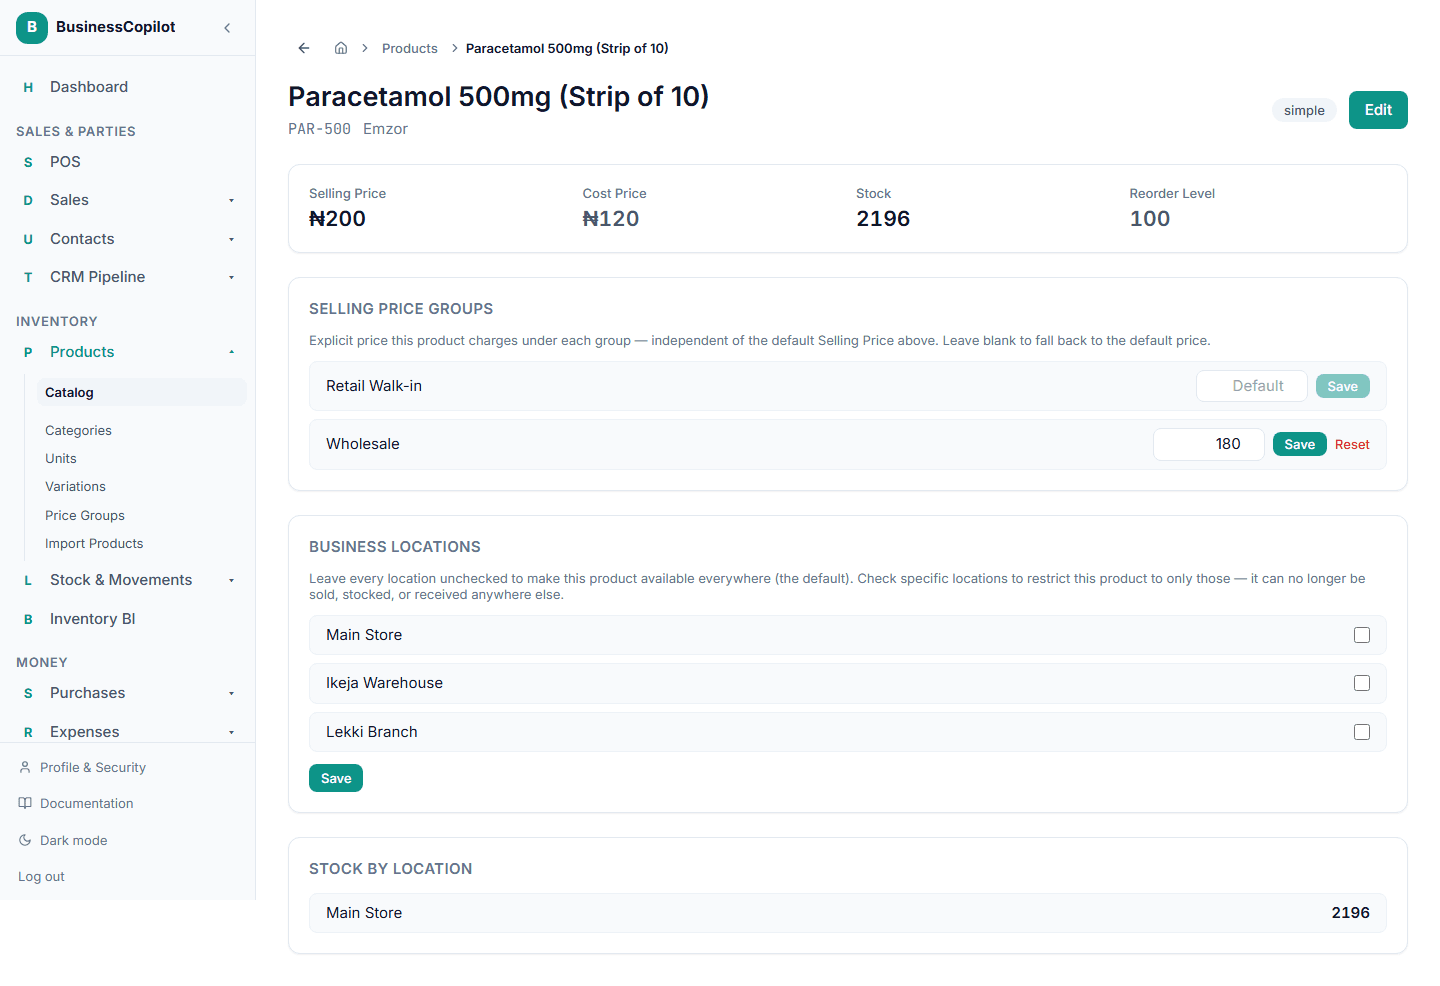
Open the product from Products, and set its price under that price group from the product's own page — a product only shows a special price for a group once you've set one; otherwise it uses your normal selling price.
Using a price group at checkout
On the checkout screen, select the price group from the dropdown above the product search box before adding items — every item you add afterward uses that group's price instead of the default.
Auto-applying a price group by quantity
Set a Minimum Quantity on a price group to have it apply automatically once a cart line reaches that quantity — you don't need to select the group by hand. For example, set Wholesale's Minimum Quantity to 12, and any line where the customer buys 12 or more automatically switches to the Wholesale price the moment you type or scan that quantity.
If more than one price group's minimum quantity is met at once, BusinessCopilot uses whichever one requires the highest quantity — so a "buy more, save more" setup with several tiers (12+, 24+, 48+) always gives the customer the best price they've actually qualified for.