Getting Started
Create your BusinessCopilot account, set up your first branch, add your first product, and invite your team.
This walks you through your first day on BusinessCopilot: creating your account, setting up your business, and getting your team in.
1. Create your account and workspace
- Go to the BusinessCopilot sign-up page.
- Fill in:
- First name and Last name
- Work email
- Business name — this becomes your workspace. One business is one workspace; see Your workspace, explained.
- Password (at least 8 characters)
- Select Start Free.
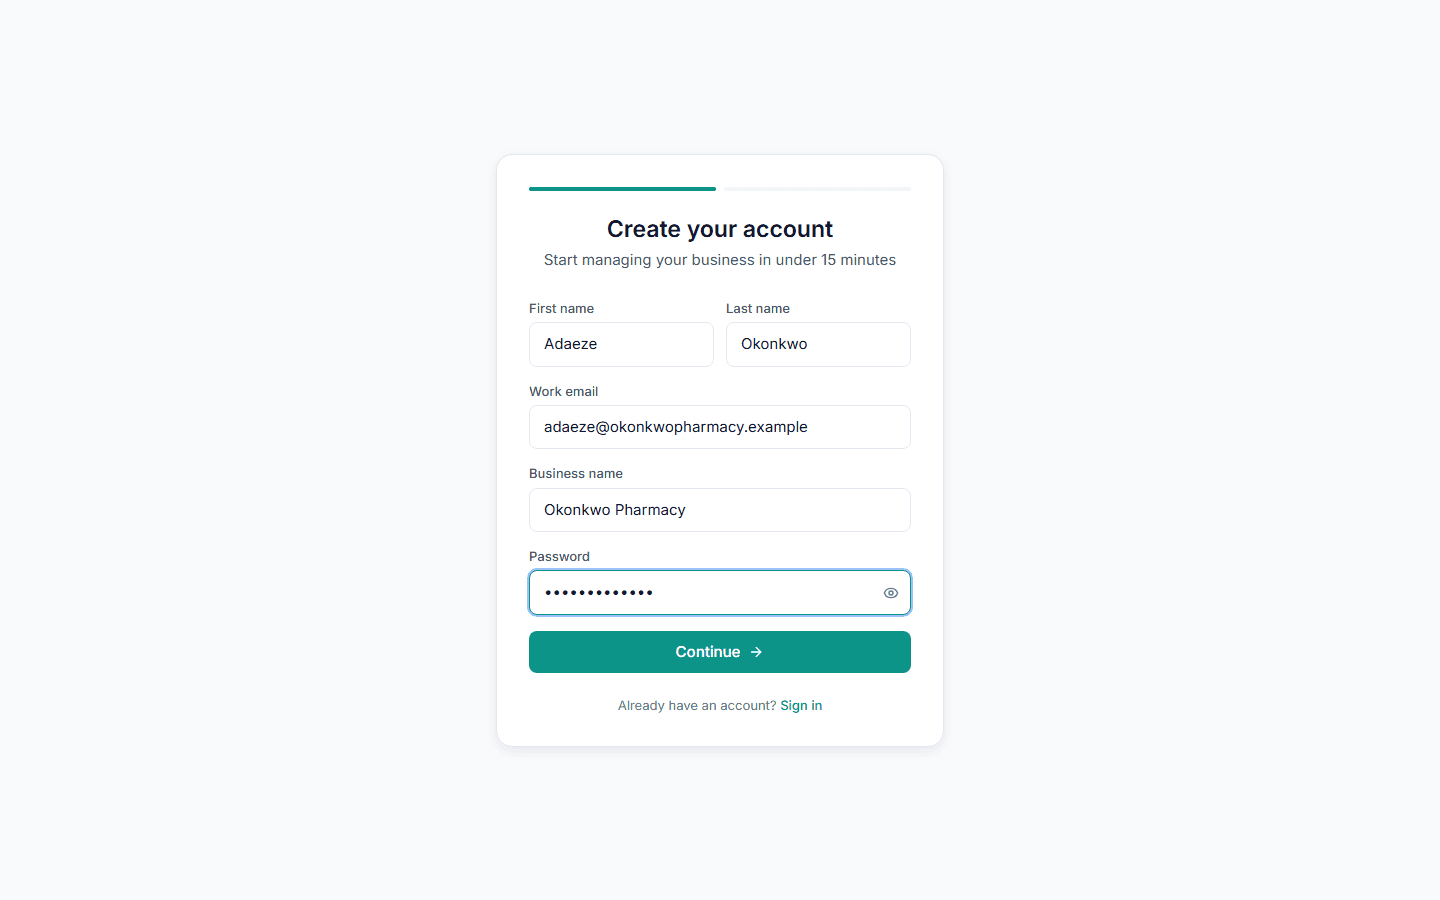
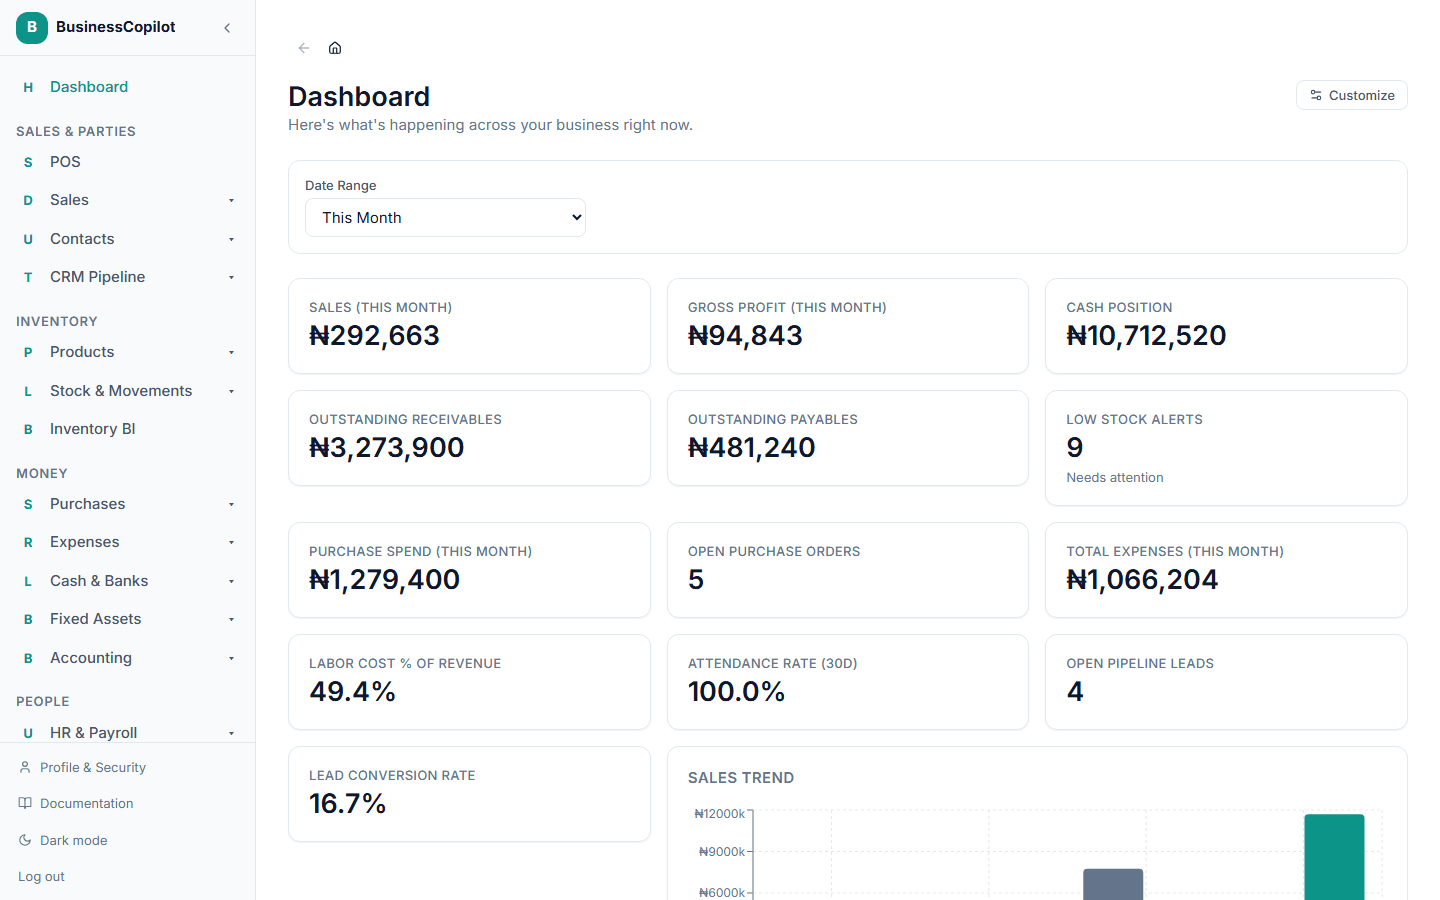
You don't need a card to do this. As soon as you sign up, you're taken straight to your dashboard as the Owner of your new workspace, and you're automatically on the Starter plan. You can change plans any time — see Plans & feature limits.
2. Set up your first branch
Every workspace starts with one default location. If that's all you need, you can skip ahead — but if you run more than one shop, warehouse, or store, add them now.
- Go to HR → Settings → Branches.
- Select New Branch (or New on the Branches screen if you're on the mobile app).
- Fill in the branch name, an optional code, its type (shop, warehouse, or packing store), and its address, phone, and operating hours.
- Save.
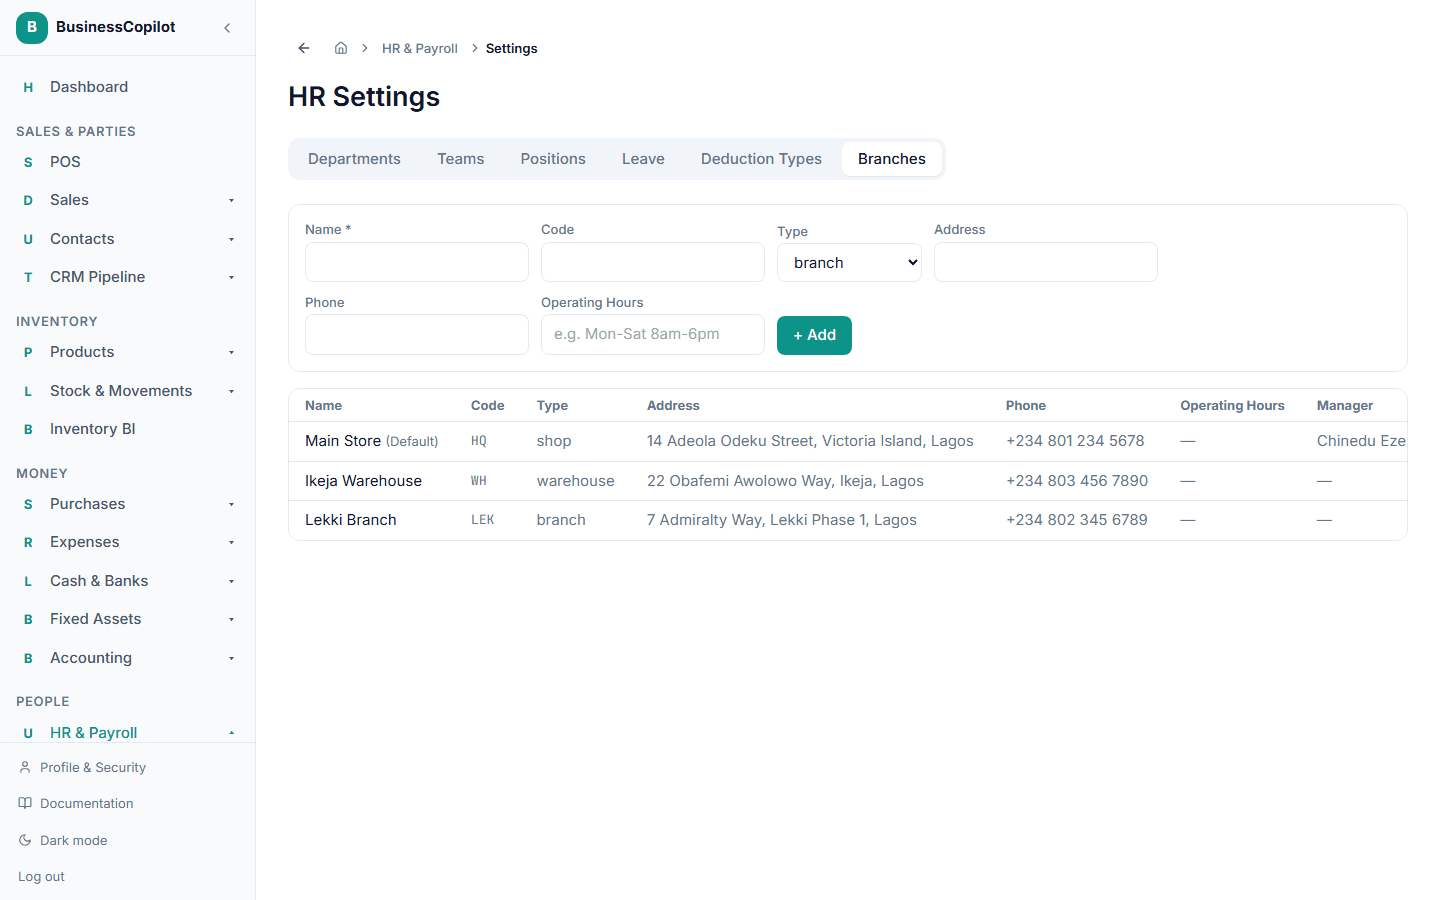
Read more about what a branch controls in Branches / locations.
3. Add your first staff member
- Go to Team.
- Select Invite Member.
- Enter their email address, pick a role (Owner, Manager, Accountant, Cashier, Sales Rep, HR Officer, Auditor, or Store Clerk), and optionally restrict them to one branch.
- Select Send Invite.
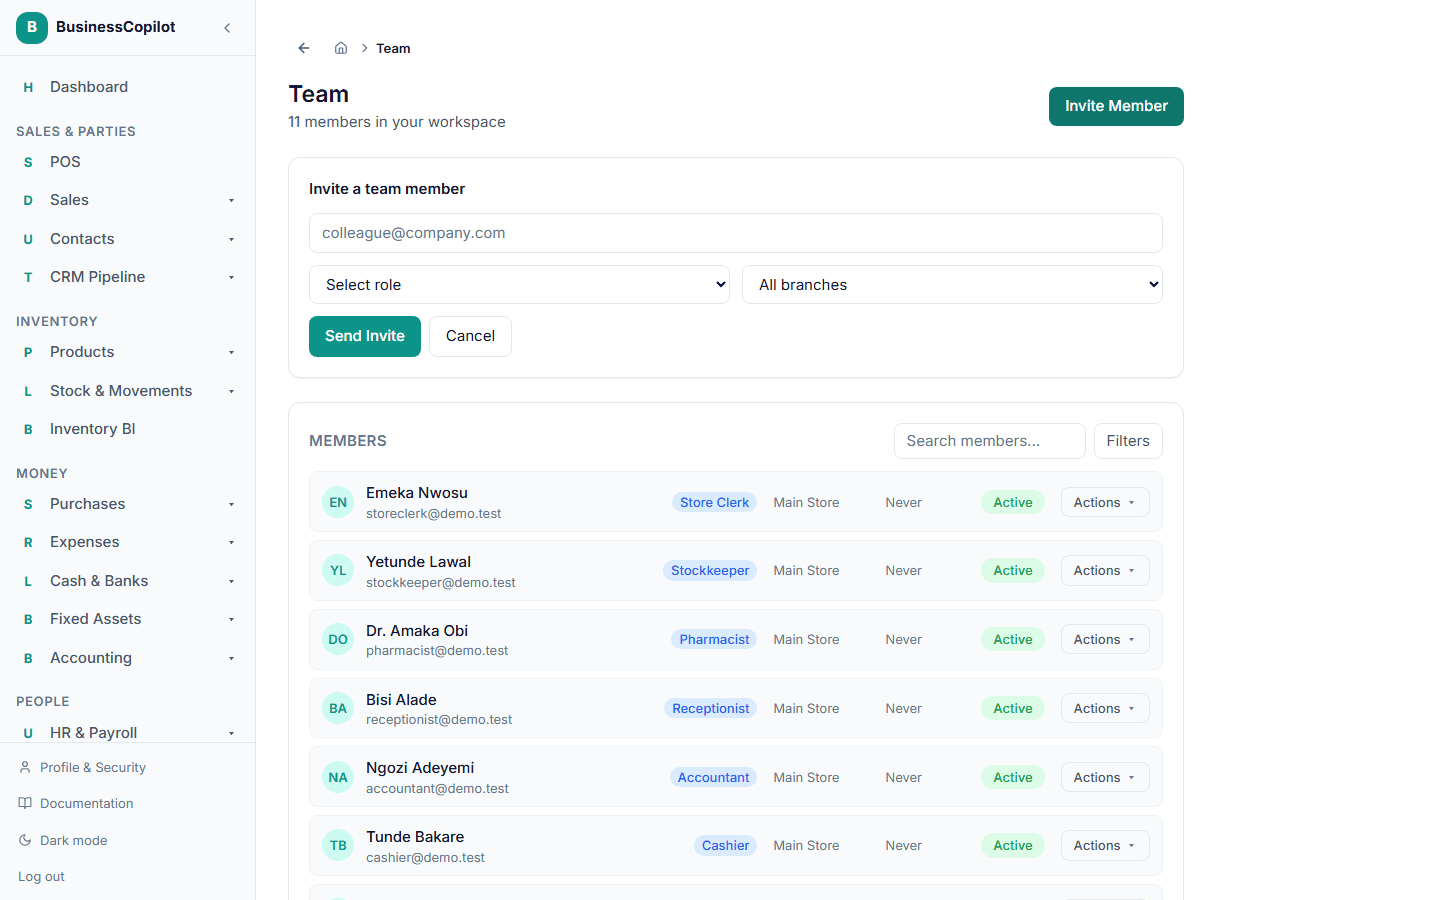
Your teammate gets an email with a link to accept the invitation. They set their name and a password, and they're in — with exactly the access their role gives them. See Roles & what your team can see for what each role can do.
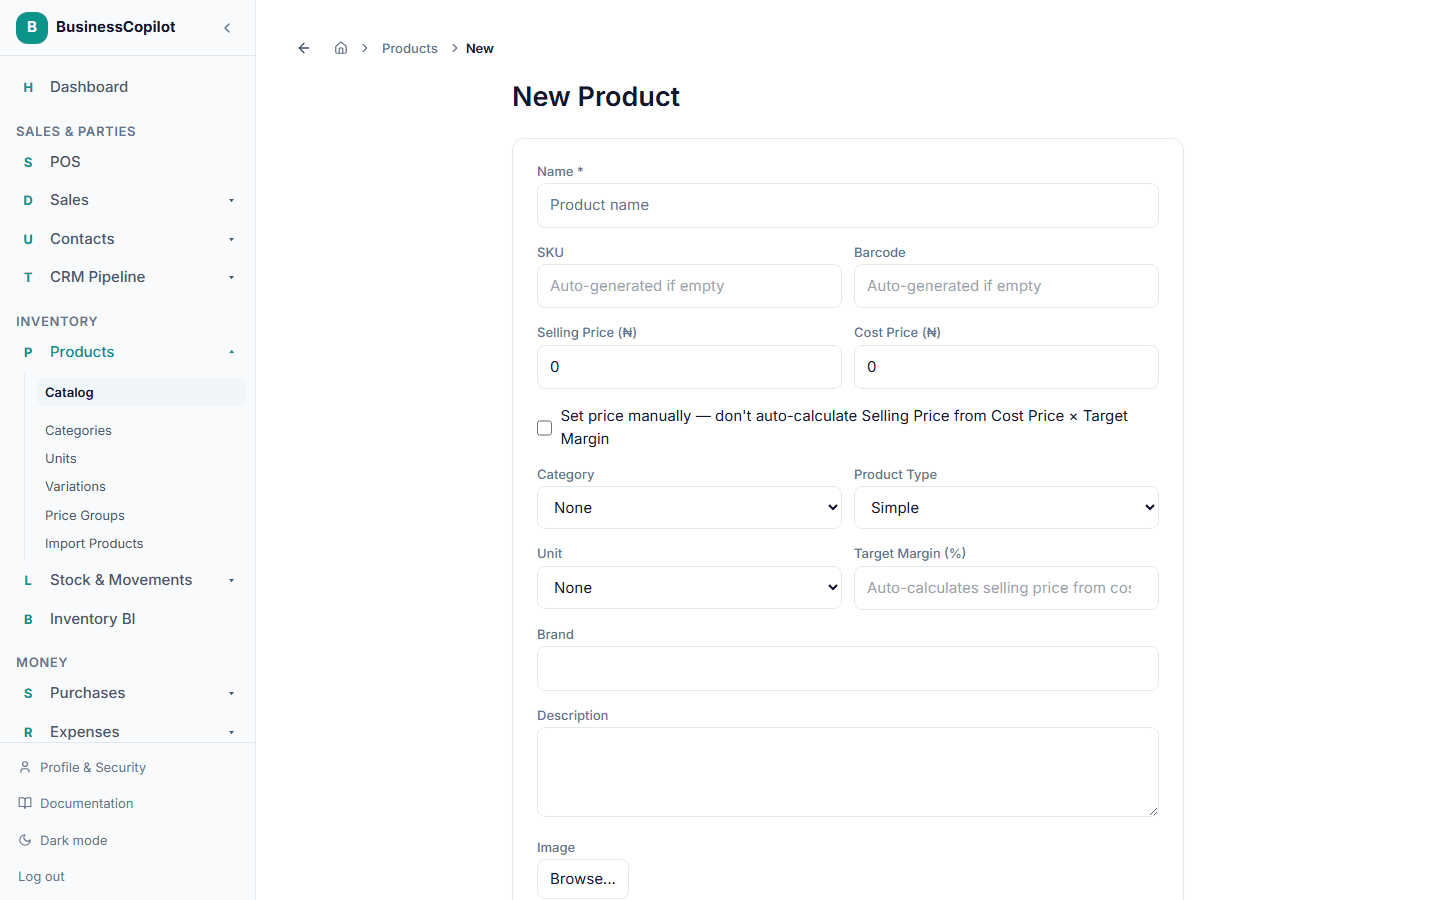
4. Add your first product or service
- Go to Products.
- Select New.
- Fill in the product's name, price, and any other details for what you sell.
- Save.
You're set up
At this point you have a workspace, at least one branch, at least one teammate invited, and one product in your catalog — enough to record your first sale. From here, explore the module sections in the sidebar as they're published, starting with whatever part of the business you run day to day.