Recording a manual journal entry
Post a journal entry by hand, reverse one, and — if your workspace requires it — approve one before it posts.
Nearly everything in BusinessCopilot posts a journal entry automatically. Use a manual journal entry for something the product itself doesn't generate — an opening balance, a correction, or a period-end adjustment.
Posting one
- Go to Accounting (Journal Entries).
- Select + New Journal Entry.
- Enter the Date, an optional Reference, and a Description.
- Add one or more lines — each with an Account, a line-level description, and either a Debit or a Credit amount.
- Optionally set an Approved By — a second person's sign-off recorded at creation, which must be someone other than you.
- Check the box if this is an Adjusting entry — a period-end accrual or correction, distinct from a regular posting.
- Select Post Journal Entry.
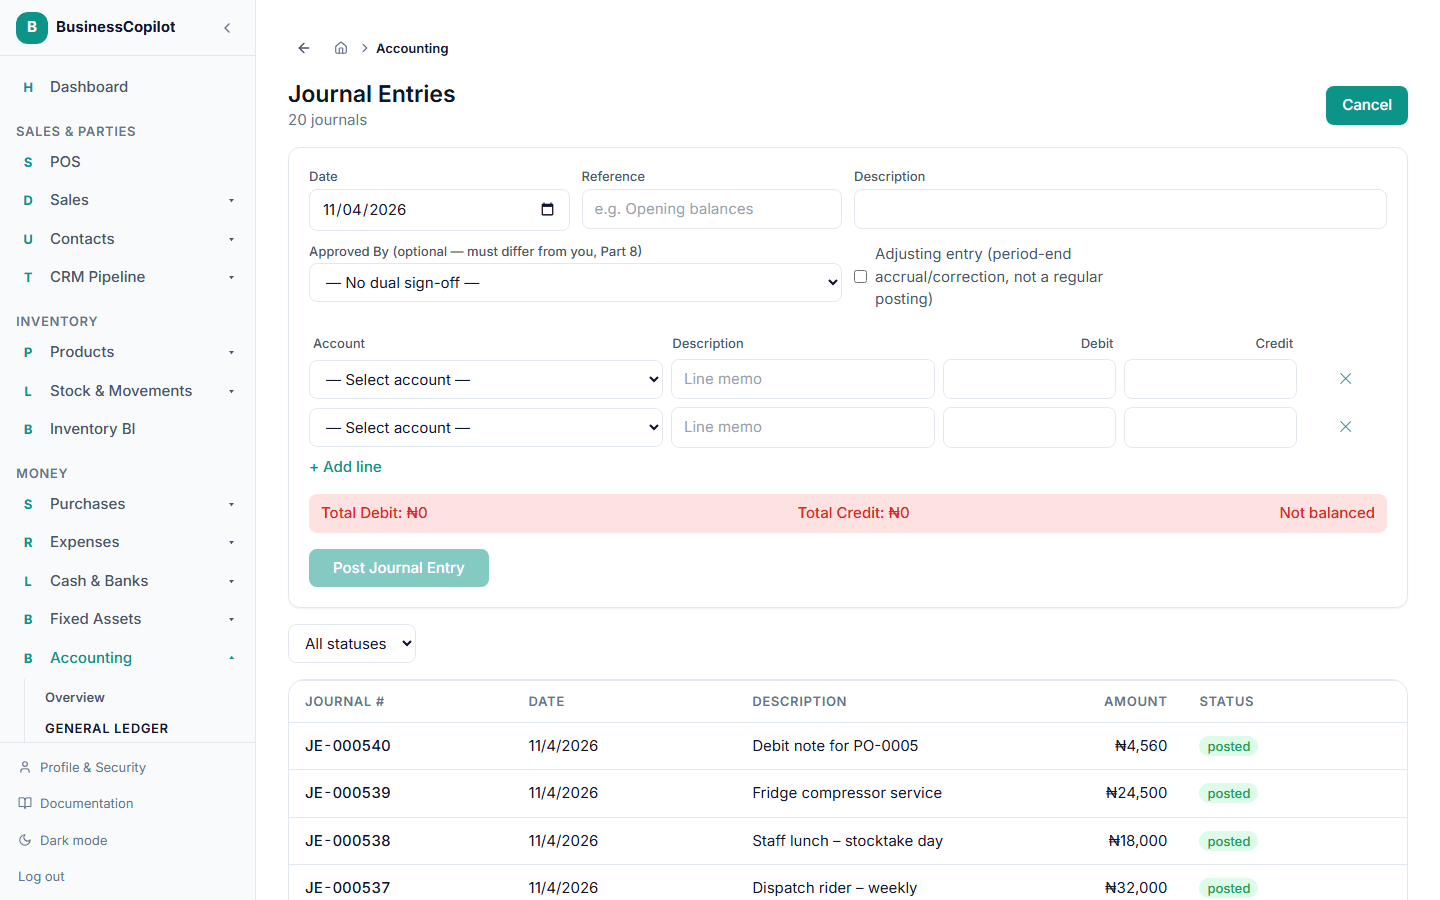
The entry must balance — total debits must equal total credits — before you can post it; BusinessCopilot shows you the running totals as you type and won't let you submit an unbalanced entry. Only accounts with manual posting allowed appear in the account picker (see the Chart of Accounts for that flag).
Requiring approval before posting
By default, a journal entry you create posts immediately. If your business has a real split between whoever enters entries and whoever should review them, turn on Require Journal Approval:
- Go to Accounting → Fiscal Years.
- Toggle Require Journal Approval on.
The exact on-screen copy: "When on, manual journal entries start as drafts and must be approved by someone other than their creator before they post to the ledger."
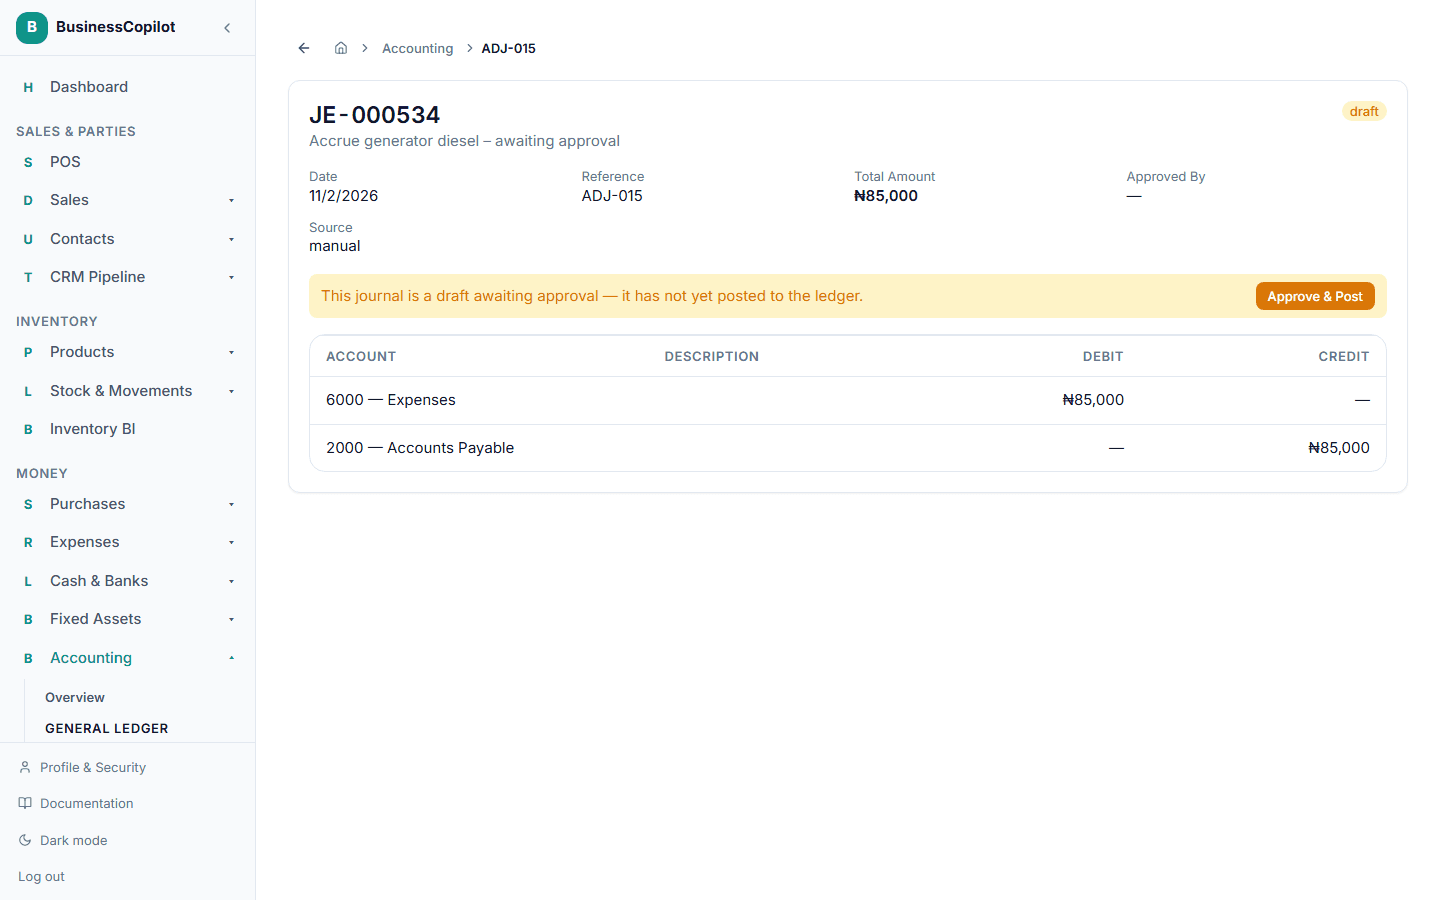
With this on, a new manual entry is created as a draft — it doesn't post to the ledger yet. Anyone with edit access opens the entry and selects Approve & Post; the person approving must be different from whoever created it, the same rule dual sign-off already enforces at creation.
Reversing an entry
A posted journal entry can never be edited — if it's wrong, you reverse it instead, which posts a new, opposite entry rather than changing history.
- Open the entry from the Journal Entries list.
- Select Reverse Journal.
- Enter a reason — required.
- Select Confirm Reversal.
The original and its reversal link to each other, so you can always see both sides.