Setting provider schedules and time off
Tell BusinessCopilot when each provider works, when they're on break, and when they're away — this decides which times can be booked.
A provider is any team member who sees patients. A provider can only be booked at a branch once they have a schedule there. The schedule is their weekly working hours; time off covers one-off absences.
You need the Edit permission on Patient Engagement (Appointments) to change schedules. Anyone with View can see them.
Adding a provider
- Go to Clinical Suite → Provider schedules.
- Select Add provider.
- Choose the Team member and the Branch.
- Select Set working hours.
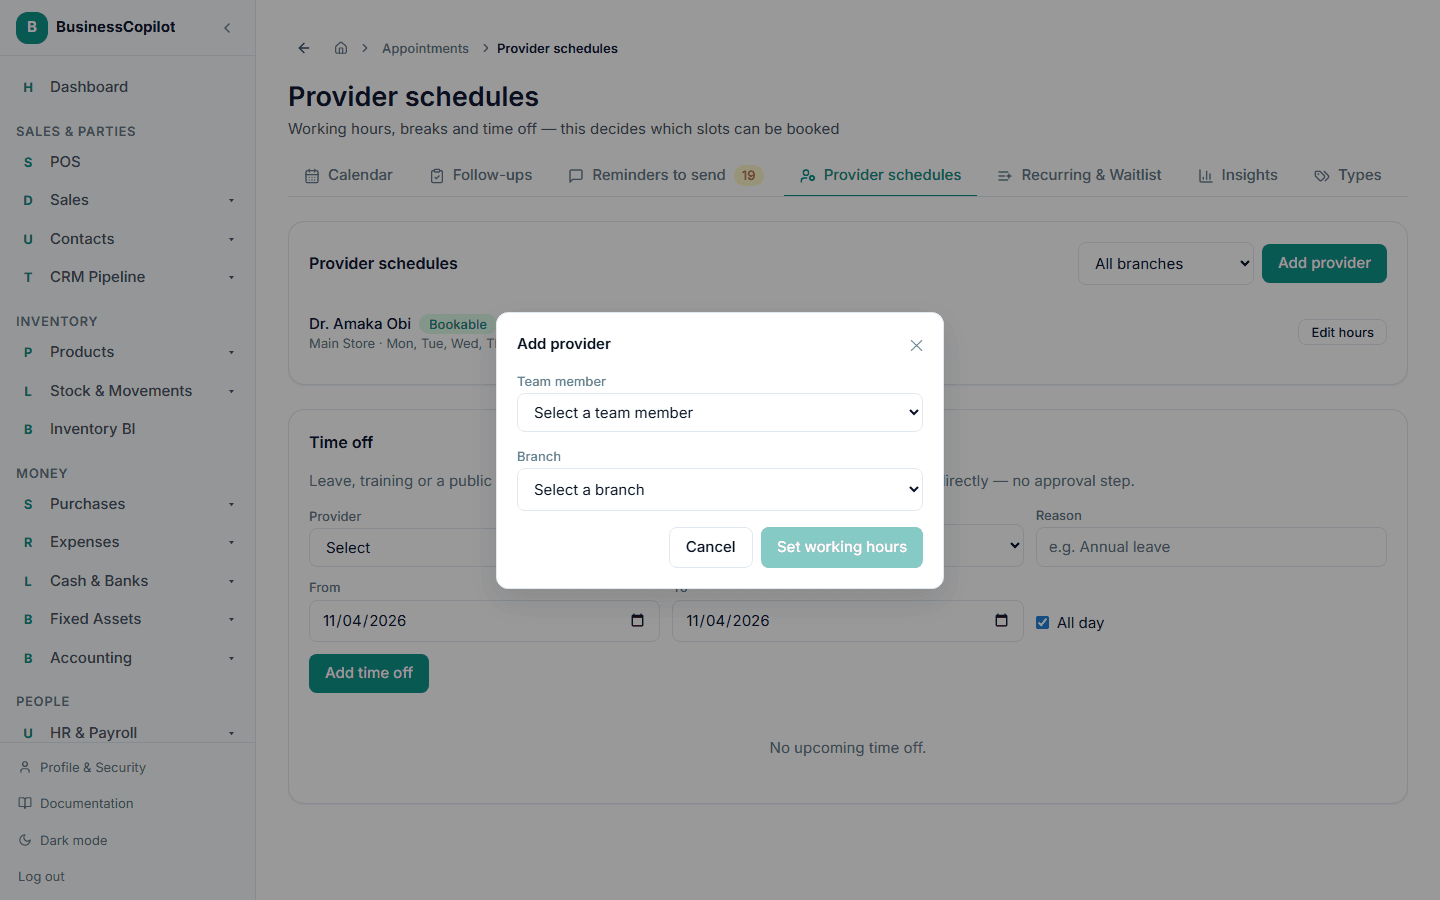
The team member must already be in your workspace — see Adding a staff member. A provider who works at two branches gets a separate schedule at each one.
Setting the working hours
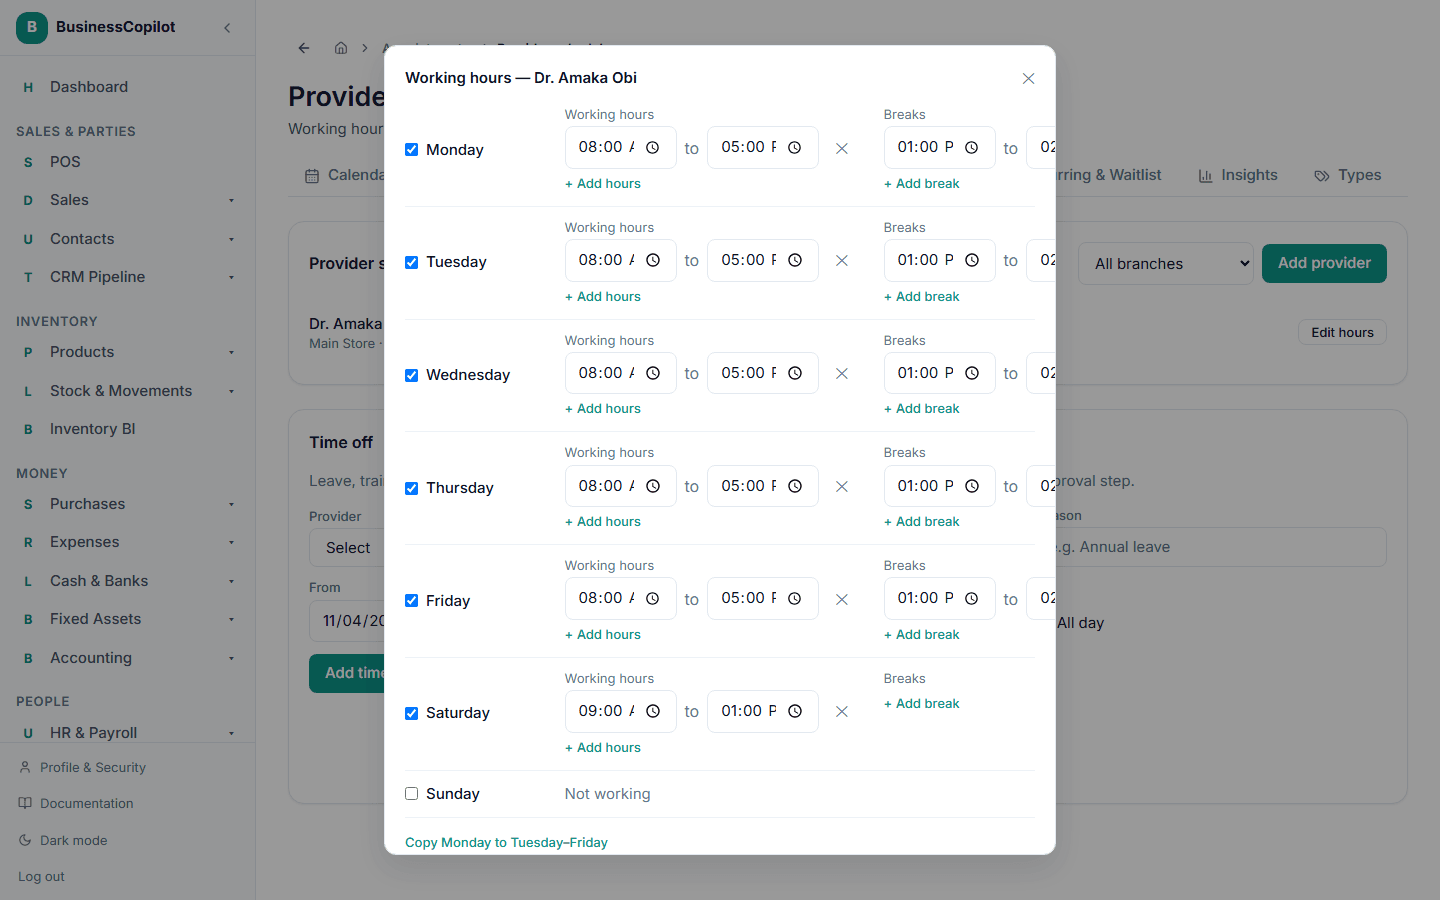
A dialog titled Working hours — [name] shows every day of the week.
- Tick each day the provider works. Ticking a day fills in 09:00 to 17:00 to start with.
- Change the times, or select + Add hours to add a second block (for example a morning and an evening shift).
- Select + Add break to take a break out of the day (for example 13:00 to 14:00 for lunch). Breaks are never offered as bookable times.
- Select Copy Monday to Tuesday–Friday to save time if the weekdays are the same.
- Leave Bookable ticked. Untick it to stop taking new appointments for this provider at this branch without deleting their hours.
- Select Save schedule.
Times are written as 24-hour clock, like 14:30, in Nigerian time.
Rules the form checks
- A ticked day needs at least one block of hours — "add working hours or untick the day".
- Each block must end after it starts.
- Blocks on the same day can't overlap.
Seeing and changing schedules
The Provider schedules page lists everyone, with a Bookable or Not bookable pill, their branch, and a short summary of their hours. Select Edit hours on a row to change them.
Time off
Use time off for leave, training or a public holiday. Anything in that window disappears from booking. There's no approval step — whoever has Edit enters it directly.
- On the Provider schedules page, find the Time off section.
- Choose the Provider.
- Choose a Branch — or leave it as All branches if the provider is away everywhere.
- Type a Reason, for example "Annual leave".
- Set From and To dates.
- Tick All day, or untick it and set From time and To time.
- Select Add time off.
Upcoming time off is listed below the form, each with a Remove button. With none it says "No upcoming time off."
Time off also shows on the calendar as a grey block, so you can see at a glance when someone is away.
Who can see and remove time off
Someone who is limited to certain branches sees time off for their own branches, plus any time off marked All branches (because it affects their calendar). They can't see or remove another branch's time off. Removing an All branches entry needs someone who can see every branch.
Time off doesn't cancel appointments
Adding time off stops new bookings in that window. It does not cancel appointments already booked there. Check the calendar and reschedule those yourself.
On the mobile app
The Schedules chip opens the same list, with the same working hours and time off, on a phone-sized layout.
Related
Patient Timeline
How the patient timeline widget on the Dashboard tab works — what events appear, how they are ordered, and how to navigate from the timeline to the full record.
Booking an appointment
Book a patient with a provider — pick a time from the open slots, understand the warnings, and book outside working hours when you really must.