Importing and exporting patients
Add many patients at once from a spreadsheet, or download your patient list as CSV or Excel.
Importing patients from a CSV file
If your patients are already in a spreadsheet, import them instead of typing each one.
You need the Create permission on Patients.
- Go to Clinical Suite → Patients and select Import.
- Select Download Template. You get a CSV file with the right column headers, and an instructions table on screen showing what each column means.
- Fill it in — one row per patient. Only the names are required (see the table below).
- Save the file, then choose it and select Import.
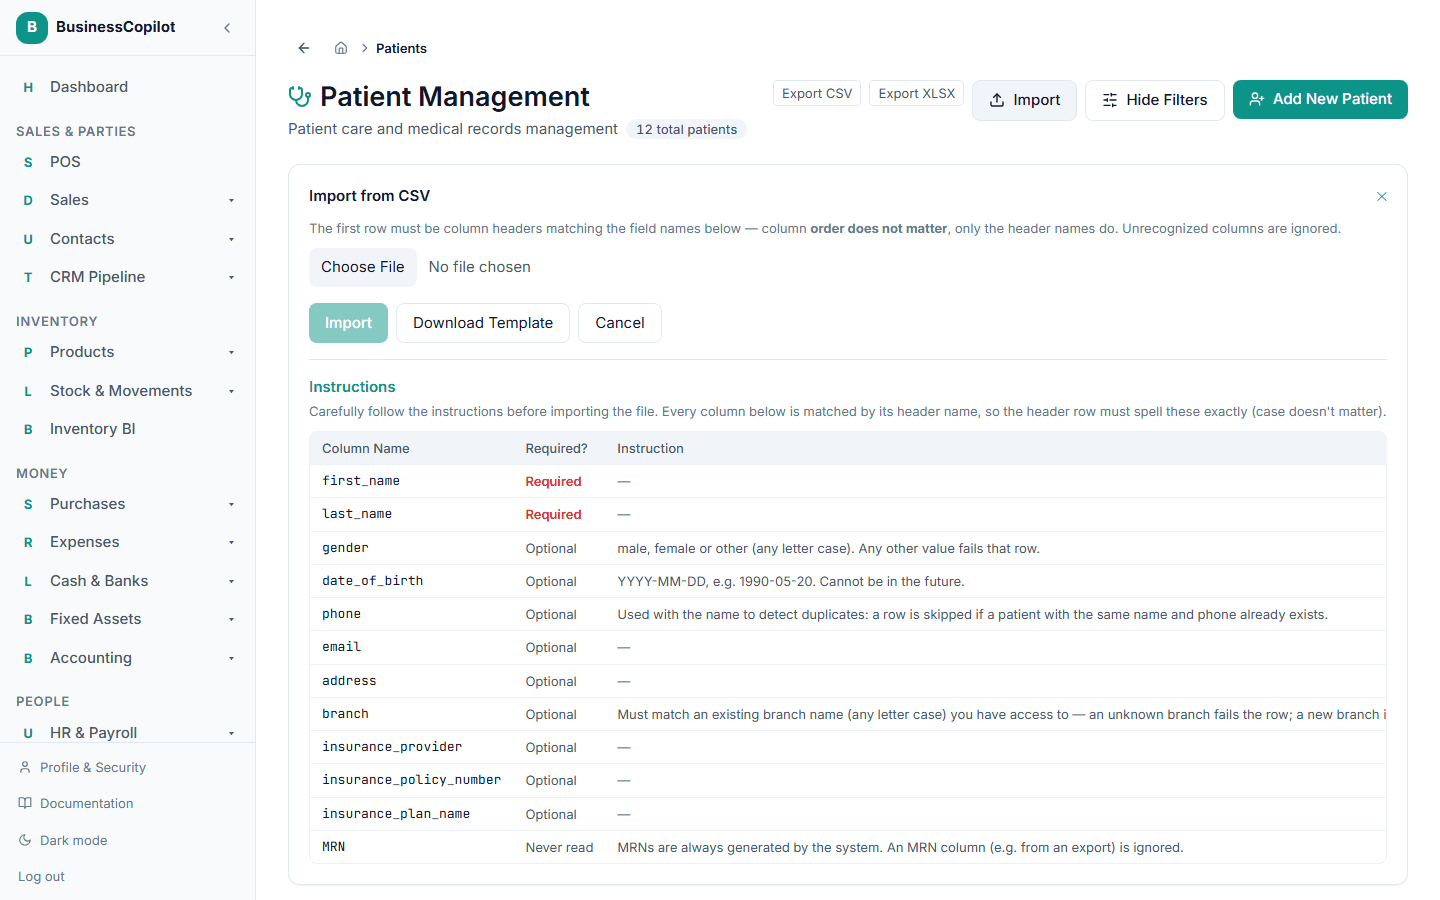
The columns
The header row must spell these exactly (capital letters don't matter), in any order:
| Column | Required? | Notes |
|---|---|---|
| first_name | Required | |
| last_name | Required | |
| gender | Optional | male, female or other, in any letter case. Any other value fails that row. |
| date_of_birth | Optional | Written YYYY-MM-DD, for example 1990-05-20. It can't be a date in the future. |
| phone | Optional | Used with the name to spot duplicates — see below. |
| Optional | ||
| address | Optional | |
| branch | Optional | Must match the name of one of your branches that you can access. An unknown branch fails that row — a new branch is never created for you. Leave it blank to use your default branch. |
| insurance_provider | Optional | |
| insurance_policy_number | Optional | |
| insurance_plan_name | Optional | |
| MRN | Never read | MRNs are always made by the system. If your file has an MRN column (for example from an export), it is ignored. |
What happens next
The import runs in the background — you can keep working. When it's done you'll see three counts:
- Created — new patients added.
- Skipped — rows ignored because a patient with the same name and phone number already exists. This stops the same person being added twice.
- Failed — rows with a problem, with the reason for each so you can fix just those rows and import them again.
Every imported patient gets a new MRN automatically.
Exporting patients
- Go to Clinical Suite → Patients.
- Optionally filter or search first.
- Select Export CSV or Export XLSX (Excel).
The file contains the patients that match your current search and filters, so you can export one branch's active patients, for instance.
You need the View permission on Patients to export.
On the mobile app
The mobile app offers the same two things from the patient list: an Import option, and an Export option that asks you to choose CSV or Excel (.xlsx).
Tip: round-tripping
You can export your patients, edit the file, and import it again. Because an import skips anyone who already exists (same name and phone), it's best used to add new patients, not to update existing ones.